Showing posts with label sewing projects. Show all posts

Tuesday, November 16, 2010

~old child’s table reborn~


before

This little table and chairs belonged to my daughters as children.

Some of you may remember pine furniture with a clear finish and cut-out hearts was very popular during the 80s.  (uh oh, telling my age.)

Now that I have grandchildren, I decided to recreate this little dining set for them.


DSC_0448Since my  kitchen cabinets were recently painted and distressed, I decided on the same finish for this little table and chairs, but with a twist. 

First I sanded the wood finish and then painted everything but the top with SW Kilim Beige (just because I had it handy.)  It happened to be the paint I used on my kitchen ceiling, but any soft ivory color would work for this effect.

DSC_0449As you can see, I painted the top with a primer.  You’ll find out why a few photos down.

On everything else, painted beige, I brushed on a mocha glaze and wiped it off till I got the effect I wanted. 

finish I also sanded a few areas that would have been worn naturally over the years.

tableAnd here’s the surprise! 

I painted the top with chalkboard paint so my grandchildren can draw, erase, and draw again.

table and chairs  I also made chair covers out of a taupe and brown tiny check cotton fabric and added piping…

table and chairs 2 appliquéing their initials on the back.

table with drawing Their table is now ready for Thanksgiving Day and for many fun times ahead.

Sharing with others at Boring to Better, Transformation Thursday,

and The DIY Project Party and

Funky Junk Interiors’ Sat. Nite Special

Thursday, November 4, 2010

~a little boy’s party ideas~


DSC_0637 Our first grandson is TWO YEARS OLD! 

So, of course, we had to make his second birthday an extra special day.

His mom and dad gave him a construction birthday party with lots of

Trucks, Construction, and DEMOLITION too!

So I made him this card to go along with the theme.

(front of card is above and inside below)

DSC_0641

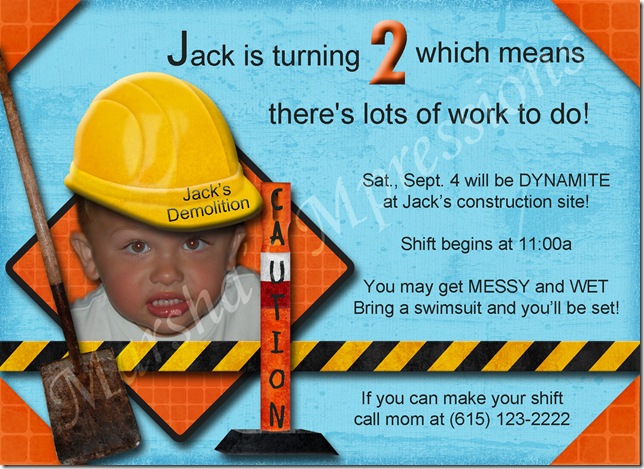
Jacks 2bd invite sample w watermark copy His mom asked me to help with his party.  Of course, I was more than happy to assist!

Above is his party invite with a construction, uh, demolition theme. 
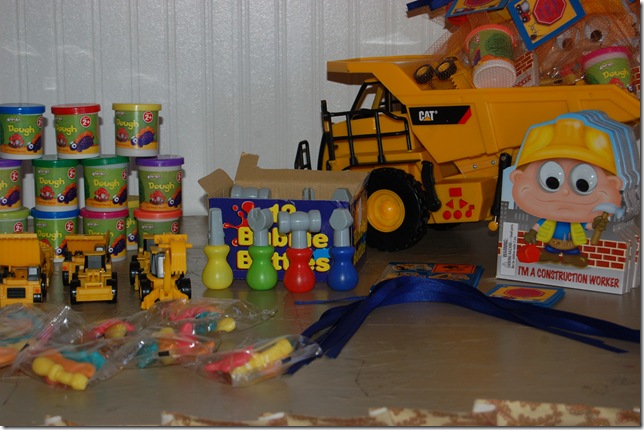
DSC_0654 For Jack’s party favors,

we bagged little toys with a construction theme in orange netting.

DSC_0668

We thought the orange netting resembled the orange border

usually draped around construction areas for security.
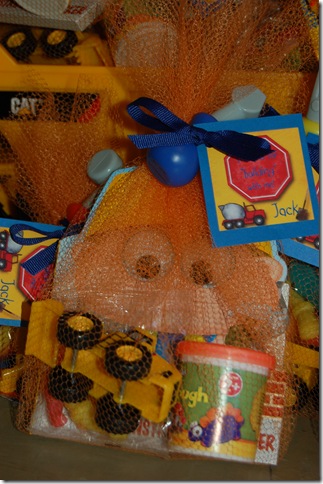
DSC_0665 DSC_0667 I made these little tags to attach to the party favors.

two shirtI was lucky enough to find some fabric at JoAnn’s with “construction” things on it,

and then appliquéd the 2 motif on a tee shirt, cutting the truck out of the short’s fabric.

balloons Jack’s friends were welcomed with construction signs and orange cones galore!

hard hatsEach child received a hard hat when they arrived.

demolition ballMy daughter set up fun play zones around the yard.

This was the demolition zone. 

We wrapped empty boxes of different sizes with red wrapping paper and then marked them to resemble bricks.  My daughter wrapped a beach ball with black fabric and tied it from a tree for the demolition ball.  The children loved swinging the ball and knocking down the blocks.
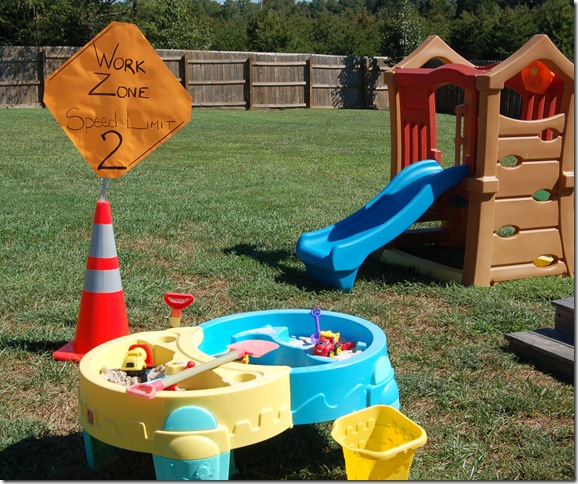
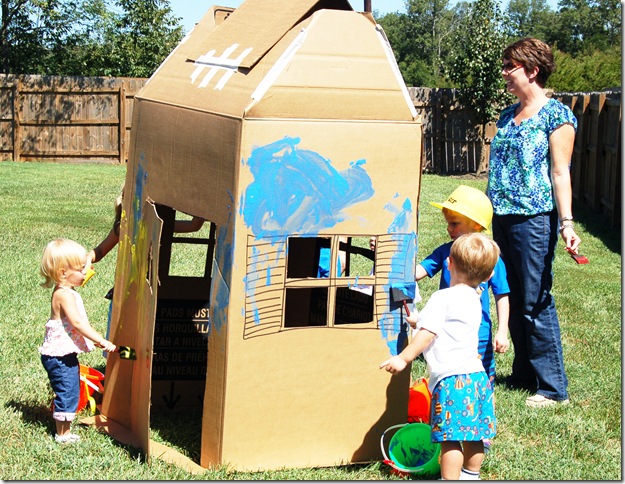
work zone painting the house dynamite My daughter filled balloons with water. 

You can see the children loved throwing the “dynamite” in the wading pool!

dirt cakeWhat’s for dessert?  Cupcakes…

dirt cake close up  and Dirt Cake, of course!

eaten cake

I think he liked it!

nickEven little brother had a good time. 

And, yes, I had to make him an outfit too!

Linking my party ideas to others great little boy ideas at

“What are little Boys Made of”

and

“Show off your Stuff”.

(P.S.  I love to create party invites and favors for parties of all ages. 

If you don’t want to do your own, email me and we can discuss creating

a custom party for you or your child.)

Monday, August 9, 2010

~just old attic finds~

sofa table side view

Since pretty boy and blue eyes left, I’ve been pulling my “stuff” out of the attic where it was stored while they were living here. (Just wasn’t room for “decor” AND playpens, highchairs, riding toys and such.

Pulling it all out again has been kinda of like when you move and unpack. You know the feeling? Lamps, books, and old collectibles look new and fresh again. You have a whole new prospective on arranging them!

I get such pleasure out of “decorating”. I never leave anything the same for too long. Tabletops at my house are like the weather in Tennessee. If you don’t like it today then stick around, it’ll change soon.

Love this apothecary jar. She is so versatile.

You can fill her with all kinds of things.

After being filled with natural items like moss, pinecones, seed pods, and even a glittered starfish or two, she's found a home on my sofa table.

apothecary jar filled with moss and stuff

I have a small collection of mallards. Love to decorate with them, especially in the fall. Their colors go so well with autumn decor. Some of mine are carved from wood, but this one’s special. She’s an old decoy.

duck

couch table

On the other side of the room, I pulled an old table back out of the attic. Oh, I love the patina of this old table. You never have to worry about damaging the surface. The harder you are on it, the more handsome it gets. You gotta love that!

wine corks

I save all my wine corks cause you never know when you’ll need them. They provide an inexpensive way to add some color and texture to the room.

side chair

The pillow was made from an old coffee sack. I made three pillows out of the same sack and if you're interested in doing something like this, check my previous post out HERE.

bird and house

Let me show you one more thing before I go pulling more “stuff” out of the attic.

On my coffee table, a little birdie perches on her nest full of eggs with her log cabin birdhouse close by.

By the way, speaking of coffee tables, I have a question for you.

coffe table

See the coffee table? Years ago, my dad cut the legs off an old pedestal dining table and created this coffee table for our home.

I’ve always loved the look of the rich oak, but, now, I’m thinking I want to paint it an off-white shabby chic. I think it would really POP on my rug. What do you think? Really, I would love to know!

Sharing with others at my friend, Marty’s for Tabletop Tuesday.

Tuesday, March 9, 2010

Just ducky

DSC_0541

Remember when I just wasn’t in the mood to sew.  No?  Click here.

DSC_0544

Well, the mood did strike me.  Pretty boy will be wearing this Sunday, if weather permits.

scan0142

If you think the appliqué is just as ducky as I do, please feel free to copy and use yourself. 

(When you’re in the mood, of course.)

Saturday, September 12, 2009

What to do with Burlap Coffee Sacks?

I was skipping with joy back to my car after finding this authentic burlap coffee sack at an estate sale recently. I wasn't sure at the time just what I'd make of it, but I knew it had potential. The fact that I only paid 2 bucks for it didn't hamper my joy either.

Pottery Barn

The coffee sack had resided in my "to do" basket until the other day when flipping through a Pottery Barn magazine I saw these pillows. The description said they were "recalled from a whimsical look of vintage coffee sacks". While drooling over these pillows, I had an aw haa moment. I have a real vintage coffee sack, I thought to myself. So why not make pillows out of it?


Now, of course, you wouldn't want to make pillows from a coffee sack that you are going to lie your head on. Burlap is a little rough, but the pillows I've made are for purely decorative purposes.


So, I made this pillow...

And this one...

and this one.

Three pillows from one $2 coffee sack! And I still have burlap left over. If you have any ideas of what to do with my scraps, please let me know. I did buy a yard of burlap to use for the pillow backs. I bought pillow forms for inserts, and wood buttons for the oblong pillow.

Pottery Barn uses buttons made from coconuts for their pillow version, but coconut buttons were more expensive than the wood buttons I used. And I don't think there is much difference in the look for the price.

And speaking of pillows, here's a tip for you if you are interested in making your own pillows. If you want soft pliable pillows, you know, the kind that leave an indention when you karate chop them down the center, stuff your pillows with down or bamboo filler instead of polyester. Down and bamboo fillers can be more expensive than polyester, but places like Tuesday Morning and TJ Maxx sell down bed pillows rather inexpensively. So buy a pillow from either of those places and tear it open to stuff your decorative pillow.

But before you start hunting for a coffee sack, check out the other projects at Susan's Met. Monday, Cheri's Knock off Knock out, and DIY Day at Soft Place to Land. Click on their names to pay them a visit. You are going to love all the ideas!

Sunday, August 23, 2009

MAKE!

Can you believe it? I'm still working on my craft room! I believe a craft/sewing room can be one of the most difficult and time consuming rooms to redo or move. For one thing, it takes so much organization which is very time consuming and then there are so many pieces to work with which may be functional, but not too attractive. I've tried not to buy anything new for this room, but use what I already have.

My dad made this looooong pine shelf for me several years ago. We put it up, but it was just too dark for my red walls so I decided to paint it the color of the trim and bead board. You can see the big difference it made in the first photo. Even though I am always hesitant to paint wood (I love the patina of old woods.), I am very pleased that I painted this shelf.

I did buy these letters at JoAnns. They were on sale for $1.99 a letter. I covered them with fabrics that I already had to coordinate with my room colors. Then I hung baskets on my shelf pegs so they'd be handy for any need I might have.

This old lamp was in my attic just itching to be redone.

I painted the brass on the lamp the same grey-green on one wall of my room and the ceiling. The red shade and stem of the lamp goes well in my room so I left it, but I did add a bias strip around the top and bottom of the shade out of the same fabric I've put on the inside of my Larkin desk. You can see the the Larkin Desk a little closer here in the first post about my craft room move. If you'd like to see the second post, click here.

I needed a place to store all my gift wrap, etc. so I pulled this old coca cola cooler out of the attic to use for that purpose.

Thanks to Susan, Rhoda, Kim for hosting these parties to share our projects. Pay them a visit at Metamorphosis Monday, Thrifty Treasures, and Make Your Monday.